
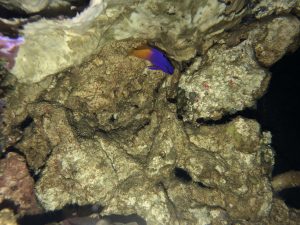
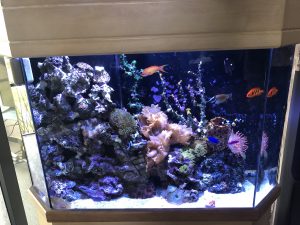
LIVE ROCK IN AN AQUARIUM WITH A ROYAL GRAMMA JUST TRYING TO ACT NATURAL
One of the first tasks you are faced with when planning a reef aquarium is how you are going to aquascape it. So what is aquascaping? The Merriam-Webster definition is as follows; An arrangement of elements (such as plants and rocks) in an aquarium intended to create the appearance of a natural aquatic environment. Basically how you lay out the supporting reef structure. When I started in the mid 90s, it was mostly live rock from the ocean. Times have definitely changed. The use of ocean sourced live rock has faded over the years, and probably for good reason. For quality dry rock, several companies come to mind off the top of my head; Marco Rocks (www.marcorocks.com), Real Reef (www.realreefrock.com), and Bulk Reef Supply (www.bulkreefsupply.com) all sell quality dry rock for use in reef tanks. No matter where you get the rock from, you are going to want to come up with a way to make interesting structures with them in order to create an interesting display. Simply stacking rocks on themselves is one way, and more feasible in smaller displays, but for more dynamic and interesting structures, you will need to get more creative. Making the underlying reef structure more functional and natural looking can make all the difference. There are many different ways to achieve this but my favorite method for many years now has been using EPO putty.
There are many 2 part putties used in the aquarium industry, however, they are not all the same. I first found EPO putty while reading through an online conversation regarding Chingchai Eukrongtham’s gorgeous reef aquarium located in Thailand. I had to pick my lower jaw off of the floor after watching a video of his system on Youtube. The vertical rock structures in this reef were nothing short of pure insanity. How in the heck did he get the rock to do that?!? A friend of mine on Facebook claimed to know and told me It was built using EPO putty. I never actually confirmed whether or not Chingchai used EPO putty but I’ve been using it to great effect for nearly 10 years now. I get it from a friend of mine, James Strauss, who owns Jim’s Reef (www.jimsreef.com). A quick Google search will show you that there are several sources online to get EPO putty but I’m an honorable and loyal friend so my money stays with James. Besides, he has the best price on it anyways.
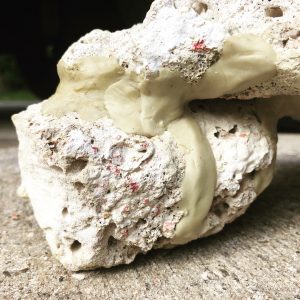
FULLY CURED EPO PUTTY
The other putties I have used do not set very hard when fully cured. They remain at least somewhat brittle. If you make a simple structure using most other brands and then drop that structure on a hard surface, more often than not, the structure will break where the putty is. I have accidentally dropped many structures I’ve put together using EPO putty and the rock itself always breaks; never has the putty itself broken. When dried, it feels more like bone. I also like the way it feels when you are working with it, having a consistency of well-chewed bubble gum.
Over the years, I have developed my own methods and procedures while using it. Let’s get into that because that is what this post is all about anyways.
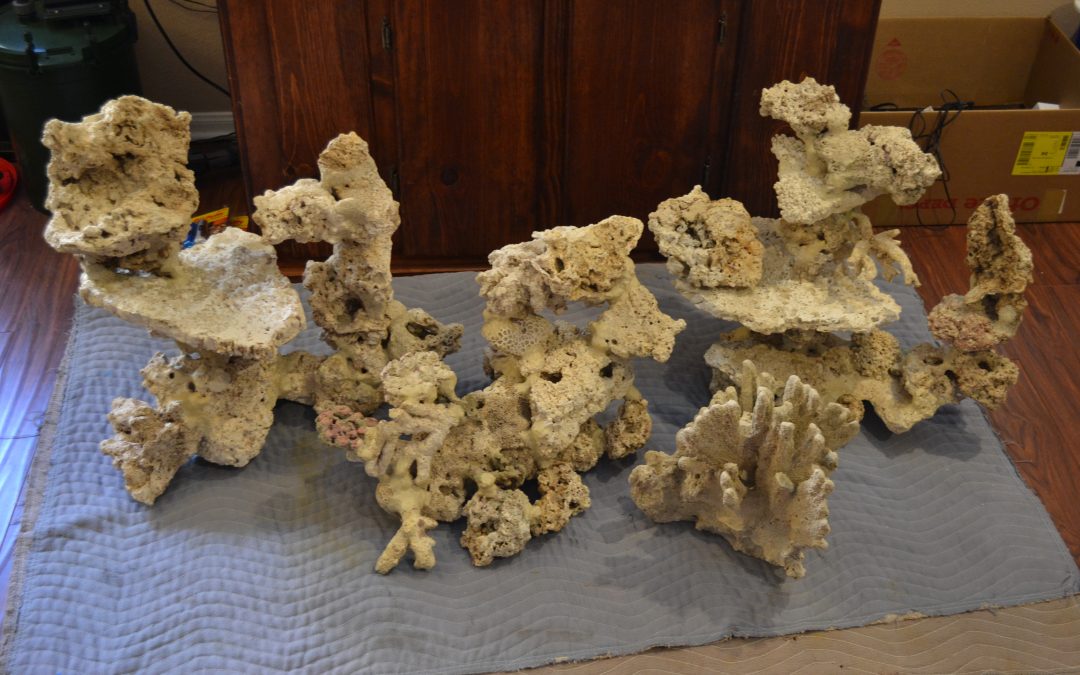
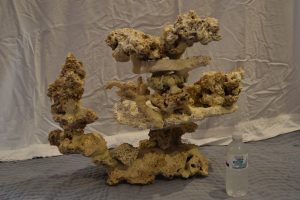
First off, I much prefer to use it out of the water. You can use it underwater, but like all 2 part aquarium use epoxies, it gets a little crumbly when you are working it underwater. I like to set up a tarp or drop cloth, set out all the rock I’m going to use, and approach it like an artist creating some art someone is paying me for…because hopefully that’s what I am doing. Look at your rocks and just start playing with them. Try to come up with some interesting structures first, before you start sticking them together. I should also say that you will want to buy a little more putty than you initially think you need. My experience after much trial and error is that you will use more than you might first think you need. If you have too much in the end, you could always find someone on the interwebz to buy it off you. Once you are ready to start sticking things together, I suggest you get a bowl filled halfway with water. This helps you work with the putty because it gets sticky. Don’t use your grandmother’s good china as the epoxy can leave some tough residue.
So there you are, with the bowl of water, the epoxy and some rocks. Tear off equal chunks of both epoxy and hardener, squish them together and dunk them briefly in the water. Hopefully you have strong hands because now you are going to knead the heck out of the combined chunks until they become a homogeneous color (beige-ish) and you can tell they are thoroughly mixed. What I like to do is to tear off appropriate sized pieces to stick between anywhere that the two rocks come into contact with each other. Since reef rock is usually very porous, you want to work the putty into the surface you are putting it on first. Get your fingers wet and push the putty into the contact point of the bottom rock. Now place the rocks together, the way you had envisioned. At this point, I like to use more putty around the bases of these spots in order to build up the area in a way that will ensure they have the strength to hold the rock together when dry. EPO has a cure time of 2.5 hours out of water and 6 hours if used underwater. If memory serves me correctly, you need to use a mixed ball of EPO within about 30 minutes or it starts getting too stiff to work with. I have mixed a little water into a quickly stiffening ball of EPO before to make it pliable again though. Just mix up enough at a time but not the whole package to avoid wasting any. You’ll get the hang of it after a couple times and learn how much to mix at any given time.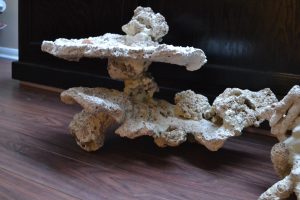
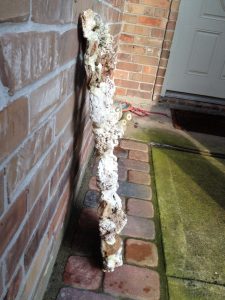
If you are using it to make an overhang or it seems like a real critical spot where you are trying to get the rocks to do something out of the ordinary, use an object to prop up the piece until the putty can harden, i.e. a stick or dowel, PVC pipe, a weight on top of the piece, use your imagination. I’ve used this putty to do some pretty crazy things. I even used it to set the soap holder back that my daughter tore out of her shower tub. Just realize that it is not a miracle product that will allow you to defy the laws of gravity and physics without some forethought and ingenuity.
I want to stress something here; if where you are sticking two objects together with EPO won’t stay in place on its own, as stated earlier, you need to counter balance it until it cures. If not, the putty will slowly squish together or pull apart depending which way the forces of gravity are working on the pieces. Don’t assume it’s fine only to come back later and find your structure ruined. Support it until cured. Yes, I know I said that a couple times but it is important.
Here is a really cool and functional thing to do with EPO. Use small scraps of rock on a flat surface to create a structure with which you can cover an overflow box or the back wall of an aquarium with. Make sure the pieces that you are using aren’t very brittle as this could be a place where the structure fails at. A structure like this uses a lot of EPO but it is worth it.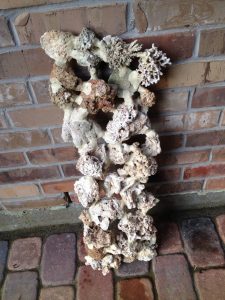
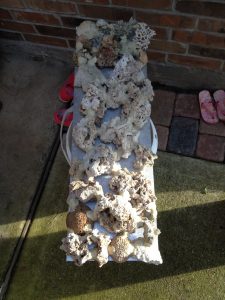
Down below, you can see this piece after several months in a reef tank I installed and maintain on Lake Conroe, North of Houston, Texas. The structure I made is on the left and zip tied to the overflow teeth in order to hold it in place.
So there it is. I encourage you to try some and please let me know if you have further questions. I’d be glad to help. Thanks for reading!
Thanks Ben – I just found out about this Blog on Reefbuilders and have been going through it – then I realised all these are done this year – Awesome. The wet skimming is an awesome idea and I am (very) slowly creating my first build. This is super helpful. Hopefully I can find this product here in Europe. With aquascaping I will have a shallow and deep tank so in the middle I can just stack some low structures but then I want to use tonga style branches in the back to give more depth to it and I want them coming out at like 45 degree (ok 60;) angles so a strong product like this would be awesome 😉 But more I just wanted to say thanks for all the posts (and I haven’t noticed any mistakes and I think it’s really well written and edited;)
Thank you so much. The wet skimming is not a product but a method. Any skimmer can do this.